Over the last fifty years, espresso has come to be considered by many to be the ‘best’ way to drink coffee. This is not true, since no brew method can be inherently better than any others, but espresso is now the most popular coffee drink consumed out of the home, and many cafés charge more for an espresso than for a filter coffee.
Undeniably espresso has been the driver of coffee retail, whether it is part of the Italian-style coffee culture now widely popular, or the Americanized, fast-food version we see in chain coffee shops across the globe.
Making espresso is both incredibly frustrating and also very rewarding. I must offer a word of caution here: don’t invest in an espresso machine at home unless you want a new hobby. The fantasy of whipping up a couple of delicious cappuccinos to drink on a lazy Sunday morning while reading the paper is a very long way away from the work involved in preparing the drinks (and cleaning up afterwards). If you just want the drinks and not the work, then do what I do and pop out to a local café where someone else can deal with it all. However, I accept that, for many of us, great coffee is not available locally and this is a good reason to master the art of espresso brewing at home.
THE INVENTION OF ESPRESSO
As we have already seen, when you brew coffee, the grind size is very important. The finer you grind the beans, the easier it will be to extract the coffee, and the less water you require to do so. This means you can produce a stronger cup of coffee. The problem starts when you try to grind the beans so fine that gravity alone cannot push the water through the bed of coffee. This puts a limit on how strong a cup of coffee you can produce.
This problem has been recognized for a very long time, and the first solution used the pressure of trapped steam to push water through the coffee. Initially this early espresso machine was simply used by cafés to make regular strength coffee much quicker, hence the name. However, the pressure you can generate from steam alone, without endangering lives, is actually relatively low so various other methods such as air pressure or mains water pressure were tried.
The big breakthrough came with Achille Gaggia’s invention. This used a large lever, pulled by the operator, to compress a spring. When the spring was released, the pressure forced the very hot water through the coffee. The sudden jump in pressure was dramatic, and allowed the use of a much finer grind of coffee to produce a much smaller, stronger, but well extracted cup.
CREMA
For most coffee drinkers, one of the key features of espresso is not just the strength of the cup but also the layer of dense foam that tops the drink. Crema is simply Italian for cream and it is the natural head of foam that forms on top of the coffee, much like a head appears on a pint of beer.
The reason this happens is that when water is under very high pressure it is able to dissolve more carbon dioxide, the gas present in coffee that was produced during the roasting process. When the brewed liquid gets back to normal atmospheric pressure on its way to the cup, the liquid can no longer hold on to all of the gas so it comes out of solution as innumerable tiny bubbles. These bubbles become trapped in the coffee liquid and appear as a stable foam.
For a long time crema was considered important, but in fact it can only tell you two things. Firstly, whether the coffee is relatively fresh – the longer ago it was roasted, the less carbon dioxide it will contain so the less foam it will produce. And secondly, whether the cup of espresso is strong or weak. The darker in colour the foam, the stronger the liquid will be. This is because crema is just a foam of the liquid, lighter in colour because of the way the bubbles refract light, so the colour of the coffee determines the colour of the crema. For this reason, coffee that has been roasted darker will also produce a darker crema. The crema cannot tell you if the raw coffee is good, or has been well roasted, or if the equipment used to make the espresso is clean – all key factors in a delicious cup of coffee.
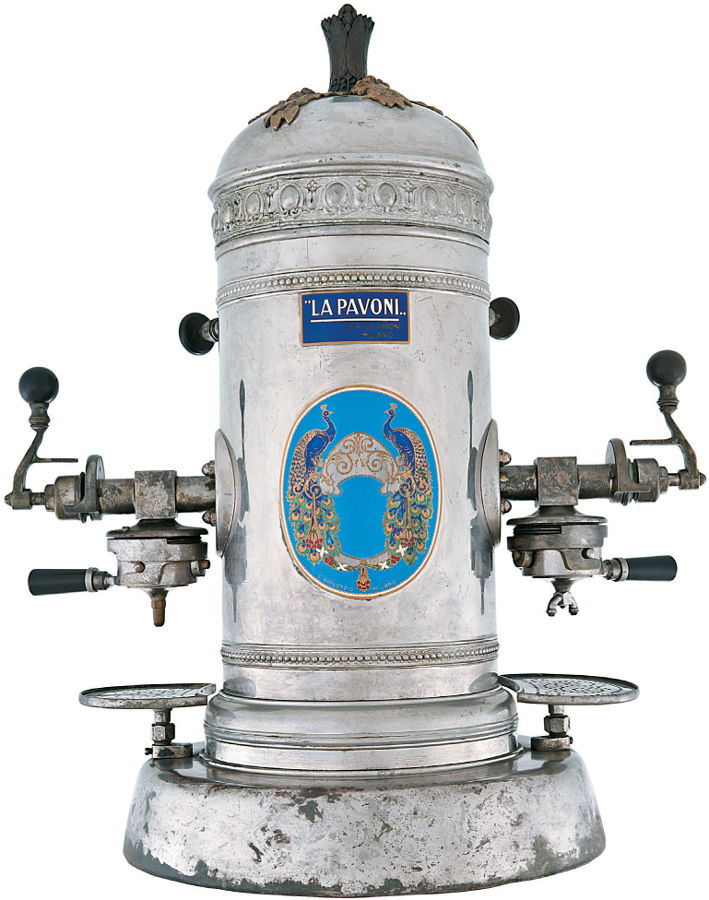 Patented in 1905, this La Pavoni two-group Ideale model was the first machine of its kind to be marketed. It introduced espresso-style coffee to Europe and, later, to the rest of the world.
THE BASIC TECHNIQUE
To brew espresso, the ground coffee is placed in a small metal basket held in a handle. The basket has tiny holes that allow the liquid to pass through but prevent any of the pieces of ground coffee, with the exception of the tiniest particles, from making it into the cup.
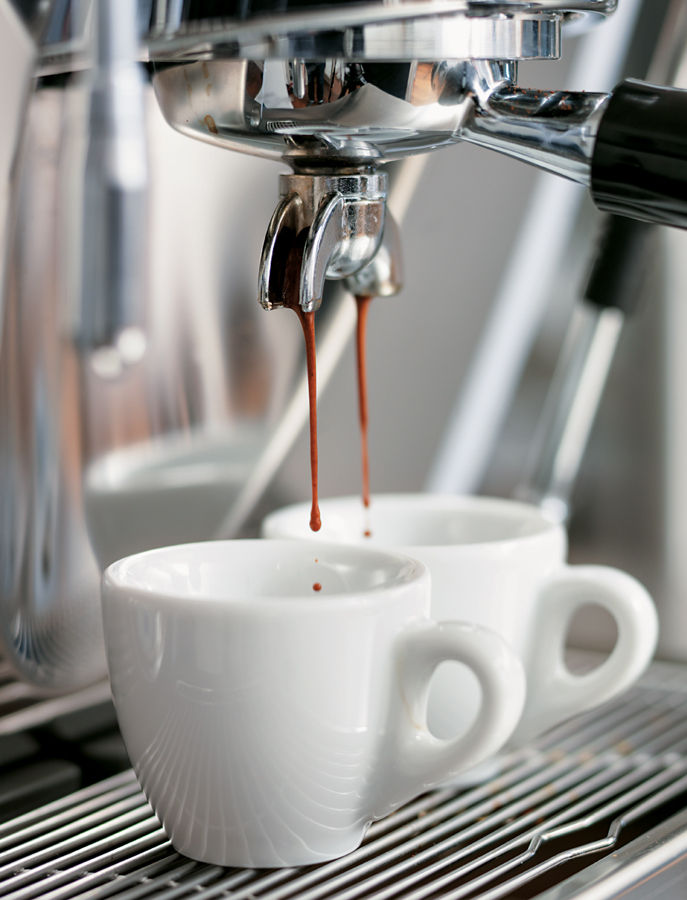
The coffee in the basket is compressed (tamped) so it is flat. The handle containing the coffee is locked into the espresso machine and the pump then activated. The machine pumps near-boiling water from the reservoir in the machine through the coffee; the liquid then drips into the waiting cup below. With some machines the operator decides when to switch off the pump to finish brewing, either gauging the end of the brew by eye or by weighing the coffee as it comes out to make sure the desired amount of water has been used. Other machines dispense a specific amount of water and then stop automatically.
Great espresso is about recipe, and good coffee roasters will supply you with plenty of information about how to brew their coffee to get great results. A good recipe is about accurate measurements and should include the following:
• The weight of ground coffee to use in grams (g). • The amount of liquid you should produce from that coffee, ideally expressed in grams or at least expressed in volume (ml). • How long the brewing process should take. • How hot the water should be for brewing.
Rather than just give a basic guide, I want to offer some information that will help produce genuinely excellent espresso at home, techniques that I have taught to baristas around the world for years and that I believe are key to brewing espresso as well as is currently possible.
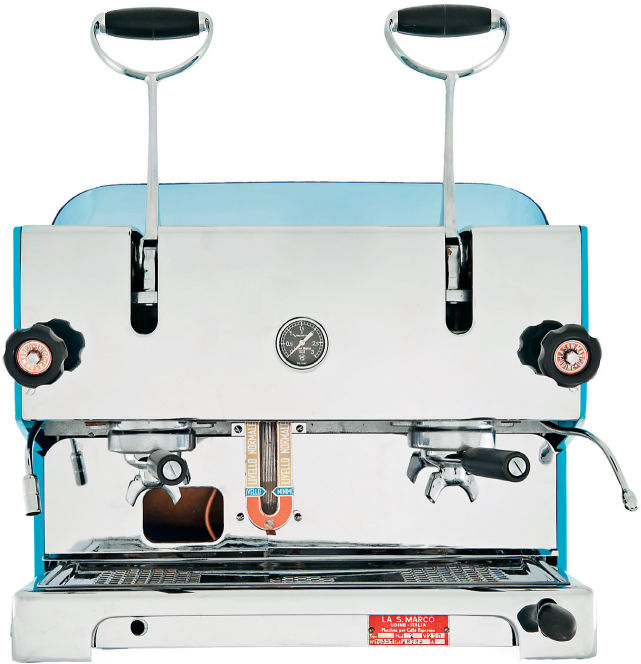 A great barista produces the desired amount of coffee in a certain time frame. Even when using a machine as sleek as this 1956 La San Marco, the first thing to check is that the grind of coffee is right.
PRESSURE AND RESISTANCE
The aim when brewing an espresso is to have the machine produce a desired amount of liquid in a certain time frame. For example, the recipe might state that we want to brew 18g of ground coffee and produce around 36g of liquid in 27–29 seconds. In order to achieve this, what we need to control is how quickly the water flows through the ground coffee.
The speed at which the water flows through the coffee determines how much flavour is extracted. If the water passes through too slowly, we take too much out of the coffee and it will be overextracted with a bitter, ashy and very harsh taste. If the water flows through too quickly, we don’t extract enough from the coffee and it will taste very sour, astringent and weak.
The way we control the flow of water through coffee is by changing how easy it is for the water to pass through. This can be achieved by varying two factors: the amount of coffee we use (the more you put in the basket, the longer it takes for the water to pass through), and the size of the coffee particles.
The finer we grind the coffee, the better the pieces fit together and the more difficult it is for the water to pass between them. If you took two jars and filled one with sand and one with the same weight of pebbles, water would flow through the pebbles much faster than through the sand. In the same way, the coarser we grind coffee the faster the machine can push the water through it.
The problem many people experience, and one that brings frustration to thousands of baristas around the world every day, is that when the flow rate is wrong and the coffee doesn’t taste good, it is not immediately obvious if the grind was incorrect or if the coffee dose was wrong. For this reason, in the home environment, I recommend measuring the coffee wherever possible. It will reduce mistakes, frustration and waste. If you have used the correct weight of coffee, you will know that it is the grind size that needs to be changed.
Espresso is probably the most intolerant method of preparation of any food or drink in the world. This is not an understatement. A few seconds outside of the target brew time, a gram of ground coffee too little in the basket, a few grams too little liquid in the cup – all of these will have a dramatic effect on the taste of the coffee and may be the difference between a delightful cup and pouring the results of your hard work down the sink.
My recommendation is to keep as many things as possible constant, and only alter one variable at a time. If you get a disappointing cup of coffee, try altering the grind size first, because if this is wrong, trying to fix something else won’t deliver the results you want, either.
TAMPING
Tamping is the term used for the compression of the ground coffee before brewing. We do this because ground coffee is fluffy, and if we put uncompressed coffee into the machine the high-pressure water would find the air pockets between the coffee grounds and pass through quickly, skipping much of the coffee. When water does not pass evenly through the coffee we call it channelling. When this happens, the resulting espresso will taste very sour and unpleasant, because the water has not evenly extracted the ground coffee.
Many people place a great deal of importance on tamping, but I do not believe it is as important as people think. The goal is simply to push the air out of the coffee bed and to make sure the bed is level and even before brewing. How hard you compress the coffee doesn’t make an enormous difference to how quickly the water passes through it. Once you push all the air out, there is little or no reward for pushing any harder. The espresso machine pushes the water on to the coffee at nine bars or 130psi (pounds of force per square inch), and this is much more aggressively than a human can push down. The goal is simply to produce an even coffee bed, and do no more.
If they notice a little coffee stuck to the walls of the basket, some people will use the tamper to tap the handle to loosen them so they can be tamped down in to the coffee bed. Don’t tap. If you tap the handle, you may knock the puck of coffee loose from the walls of the basket, allowing the shot to channel. Secondly, you may damage your tamper and the nice ones are beautiful objects in their own right.
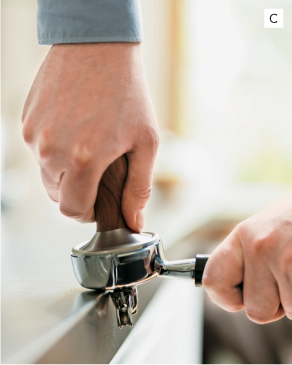
My final piece of advice is to hold the tamper properly. It should be held like a flashlight, with your thumb pointing straight down. When you apply pressure to the coffee, your elbow should be directly above it and your wrist should be straight. If you imagine a screwdriver in your hand, and a screw sticking directly up out of the work bench, you should put your arm in this same position as you push down in order to protect your wrists (see Espresso Method). Repeatedly performing this action incorrectly has given a huge number of professional baristas trouble with their wrists.
ESPRESSO METHOD
In this process we’re going to make two cups of espresso. These could go into two separate cups, or into one cup as a double espresso.
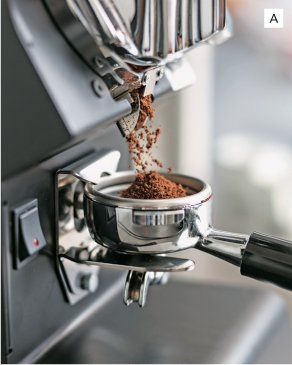
1 Fill the reservoir in the espresso machine with water with a low mineral content, suitable for brewing coffee, then switch on the machine to heat the water. 2 Grind the coffee just before you start brewing. Be sure to weigh the coffee first. A
3 Make sure the basket is clean. Wipe it with a small dry cloth to make sure it is dry and to remove any leftover grounds once you have tapped out the puck of coffee from the last brew. The cloth will help remove the oily residue from the last brew as well. 4 If you can, place the entire brew handle (also called the portafilter) on the scales to weigh out the coffee. If this is not possible, remove the basket from the handle and place it on the scales. B
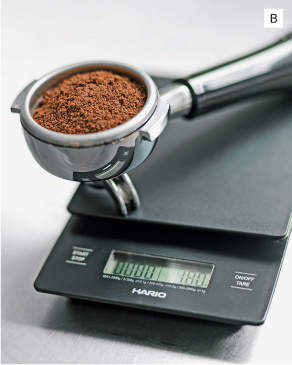
5 If your scales are accurate enough, weigh the ground coffee to within 0.1g of your recipe, whether it is your own recipe carefully honed over time, or the recipe given to you by the roaster. This level of accuracy may seem like overkill, but digital scales are now relatively cheap and I promise that using a set of scales will help you make more delicious coffee more often. 6 Remove the handle from the scales and tamp the coffee flat in the basket, keeping your wrist straight, to make sure the coffee bed is even. Leaving the tamper on top of the coffee – observing the angle of the handle will show you whether or not it is sufficiently flat. C
7 Weigh the cup or cups into which you are going to brew the coffee. 8 Turn on the machine to flush some water through the group head. This will help to stabilize the temperature of the brew water, as well as rinse off any coffee grounds remaining from the previous brew. 9 Carefully lock the handle into the machine and arrange the cup(s) in place to receive the coffee. 10 Get your timing device ready. If the machine doesn’t have a time display showing you how long the shot has been brewing, use a simple stopwatch on your mobile phone or a kitchen timer. 11 As soon as possible, start brewing the coffee. When you start to brew, start the watch. Brew the coffee for the length of time recommended by the roaster. If you don’t have a recommendation, try somewhere between 27 and 29 seconds. 12 When the desired brew time is up, stop the machine. When the handle has finished dripping (after a few seconds), return the cups to the weighing scale to check how much coffee you have made.
 The original home of the espresso is Caffe Florian on St Mark’s Square, Venice, which has been serving coffee since 1720.
JUDGING THE RESULTS
Ideally, the weight should be within a few grams of the roaster’s recommendations. If it is not, we can make a simple change to try next time:
• If there is too much liquid, the flow was too fast. We need to slow the water down by grinding the coffee finer.
• If there is not enough liquid, the flow was too slow. We should increase the flow rate by grinding the coffee more coarsely.
For many people this kind of precision seems a little extreme, and some prefer to use volume in the cup (gauged by eye) instead of weight. This same protocol will work, but it is not as accurate.
Once a grinder is set for a particular batch of coffee, there will be limited need to adjust it, unless your home is subject to dramatic swings in temperature during the day.
CHANGING THE GRIND
With espresso, you really need to be grinding the coffee yourself with a burr grinder that allows you to adjust the grind size easily. When you start brewing a new bag of coffee you will need to set the grinder for it. The term we use for setting a grinder in the industry is ‘dialling in’.
Just about every grinder has some ground coffee left inside it after grinding. This means that if you change the grind setting, the first coffee it will push out will actually be the old grind size. A common practice is to purge the grinder by grinding a few extra grams of beans at the new size to push out the old grounds, and then to throw this coffee away. If you change the grind size but don’t see a change in the brewing process, it is likely you did not purge enough coffee from the grinder.
I would always recommend making small changes when adjusting a grinder. When you get a new grinder, it is a good idea to buy some cheap (though ideally fresh) coffee to play with to make sure you understand how big an effect a small change in the grind setting has on the brewing process. Most grinders have numbers on the settings. The actual value of the numbers is meaningless, but if you want to grind finer, turn the dial to a smaller number and vice versa. Many grinders have marked steps that you can select, sometimes whole numbers and sometimes divisions of numbers. Start by changing the setting by a single step when the grind is wrong.
BREW RATIO
There are many different styles of espresso, and people have different preferences for how long or strong they like their espresso to be. Commercially we tend to talk about the brew ratio: how much liquid should you be brewing from a fixed weight of ground coffee? My own personal preference, and recommended starting point, is to brew two parts of liquid out of one part ground coffee. For example, if I start with 18g of ground coffee, I would want my espresso to weigh 36g (2 x 18). The Italians generally prefer a smaller coffee, so if I were making a double espresso I might use 14g of ground coffee to produce 28g (2 x 14) of liquid. The ratio of coffee to water is fixed to maintain my strength preference.
If I want a stronger espresso, I can change my ratio. Instead of 1:2 I might use 1:1.5, which would mean my 18g of ground coffee produces only 27g (1.5 x 18) of liquid. This shorter espresso will be very strong, and I would have to adjust the grind finer so the brewing process takes a similar amount of time. If I just let a smaller amount of water come through at the same flow rate as before, the brew will be over faster and I will have failed to extract all of the good flavours that I want.
BREW TEMPERATURE
The coffee industry is only now recovering from an obsession with the stability of brew temperature in espresso brewing. Changing the brew temperature does have an effect on the extraction and the taste of the coffee, but I don’t believe it is as important as many make it out to be. The hotter the brew water, the more effective it will be at extracting flavour. So for lighter roasts I would recommend a higher brew temperature than for darker roasts, which give up their flavours more easily.
There are claims that a change in temperature of 0.1°C (0.18°F) will change the taste of the coffee. I believe that to be nonsense. I think 1°C (1.8°F) creates the smallest change that most of us could detect, and that a slightly incorrect brew temperature is so rarely the reason I am served a poor espresso.
If you can control the temperature on your espresso machine, I would recommend a water temperature of between 90°C (194°F) and 94°C (201°F). If the espresso does not taste right, try adjusting other aspects of the recipe first. However, if there is a persistent negative taste (such as a constant sourness) try increasing the temperature, and if there is a persistent bitterness, try decreasing the temperature (after you have checked your equipment is properly clean).
 A meeting place for artists, intellectuals and students, College Street Coffee-House, near the University of Calcutta in Kolkata, India, has played an important role in the city’s cultural history.
BREW PRESSURE
The first espresso machines created pressure using a compressed spring to push the water through the coffee. As the spring expanded, the pressure it produced would decline, so it started with a very high pressure and ended up relatively low. When electric pumps became common, they needed to be set at a constant pressure. Some say that the setting of nine bars (130 psi) was chosen because it was the approximate average of the varying pressure created by the springs on older machines.
Luckily, this also appears to be the pressure at which we get the best flow rate. At pressures below nine bars, the coffee bed provides so much resistance that the flow rate drops. At pressures above nine bars, the coffee bed becomes so compacted that the flow rate drops again. As long as your machine produces roughly the right pressure you should have no trouble. If the pressure is too low, your espresso may lack body and the desired creaminess. At very high pressures, there can be a strange woody bitterness to the espresso that is not enjoyable.
There is now equipment available that allows baristas to adjust the pressure of their brew water, but there is not yet enough data to make a viable case for introducing this technology to home machines.
CLEANING AND MAINTENANCE
I would estimate that 95 per cent of the commercial coffee machines in business throughout the world are not cleaned properly and this is one of the reasons people are served disappointing, bitter and unpleasant coffee every day. There is no such thing as too clean, and although it requires a little bit of work each time you finish making coffee, a clean machine will make your coffee taste consistently sweet and clean.
COFFEES ROASTED FOR ESPRESSO
Espresso is quite different from the other brewing methods, and because of the small amounts of water being used it is often a challenge to fully extract the coffee. Additionally, because the concentration is so high (the coffee being so strong), balance is very important. A coffee that may taste delicious and balanced as a weaker brew can become dominated by overpowering acidity when consumed as a stronger cup.
For that reason, many roasters change how they roast their coffee when they know it is going to be used for espresso. Though this practice is not universal, I would certainly recommend a slightly slower and slightly darker roast for espresso than I would recommend for a coffee being brewed with a filter.
However, roasters around the world disagree strongly about what the right level of roast is for espresso and there is a wide spectrum on offer from relatively light through to a much darker roast. Personally, I prefer lighter roasts because they allow the particular characteristics of the raw coffee to be appreciated. Darker roasts often carry a more generic ‘roasted coffee’ flavour, and also have a higher level of bitterness, which I don’t enjoy. What I prefer is only really important to me, however, and everyone has their own preference.
The darker the roast of coffee, the easier it is to extract. This is because the coffee bean becomes increasingly porous and brittle as it is roasted. This means that less water is required in the brewing process to properly extract the coffee. If body and mouthfeel are important to you, then you might prefer slightly darker roasts brewed at a 1:1.5 brew ratio. If sweetness and clarity of flavour are important, I would recommend a lighter espresso roast brewed at a ratio of 1:2.
• When you finish making coffee, remove the basket from the handle and clean underneath it with soapy water on a scourer. If you don’t do this, an unpleasant patina of dried coffee will accumulate there and it will smell and taste awful.
• Espresso machines dispense water through a mesh screen. If this is easily removable on your machine, take it out and clean it, and also clean the water dispersion block it sits against.
• While the dispersion screen is out, clean the rubber gasket. If coffee builds here, the basket won’t make a seal against the machine and water will leak out during brewing, often dripping down the sides of the brew handle into the cup.
• Remove the brew basket from the handle and replace with the cleaning basket. This is the basket with no holes in it that will have been supplied with your machine.
• I recommend using a commercial espresso machine cleaner at the end of every session of coffee making. This will clean out any liquid coffee left inside the machine, which will turn increasingly rancid and unpleasant over time. Follow the manufacturer’s instructions for how to use a cleaning powder on your machine.
• Make sure the steam wand is clean if you have used it.
Some people claim that a machine can taste too clean, and that you need to brew an espresso or two to ‘season’ it after cleaning to take away the metallic taste. I have never found this to be the case, and as long as your machine is properly warmed up (add at least ten to fifteen minutes on top of manufacturer’s recommendation), it should make great coffee straight away.
I recommend keeping the machine switched off when not in use. Use a timer to make sure it is ready to make coffee when you want it, but turn it off when you have finished. Espresso machines use quite a lot of power and it is a waste to leave them on if they are not being used.
To keep your machine in good working order, make sure the water you use is suitable. If you use hard water, limescale will build up quickly in the machine and cause it to malfunction. Many manufacturers offer advice for descaling, as some limescale will form even in soft water areas (it will just take a lot longer). Err on the side of caution because if you let your machine scale up completely, it may be difficult to descale without help from a professional (and a bill to go with it).
Over time, the rubber gasket in the group head may need changing. When you lock in your brew handle, it should stick out at ninety degrees to the machine. If it starts to twist much further across, the rubber may be wearing and it should be replaced.
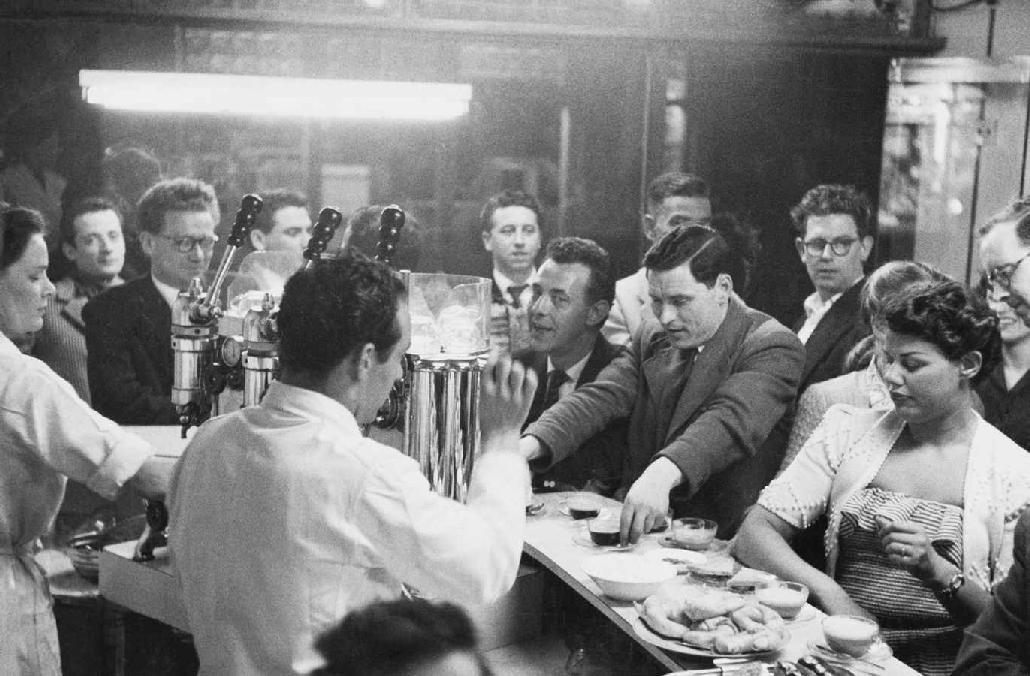 Customers congregate around baristas at London’s first espresso bar, the Moka Bar at 29 Frith Street, which was established in 1953 and opened by the Italian actress Gina Lollobrigida.
STEAMING MILK
Well-steamed milk combined with well-brewed espresso is a wonderful sensory experience. Great milk foam is like liquid marshmallow: soft, moussey and undeniably enjoyable to drink. The goal is to create bubbles so small that they are almost invisible (often called ‘microfoam’). Foam like this is elastic and pourable, and adds a wonderful lift to the texture of drinks like cappuccino and café latte.
It is important to use fresh milk for steaming. As it reaches its use-by date, milk tastes fine and is still safe to drink but it starts to lose its ability to create a stable foam. It will foam as normal when you steam it, but the bubbles will soon break down. If you lift the jug of foamed milk to your ear, you will hear it fizzing like a freshly poured soda as the air escapes.
When we steam milk we have two separate tasks to accomplish: we must whip in air to create the bubbles and we must heat the milk. With most steam wands it is best to tackle one task at a time, so the first thing to focus on is creating the bubbles. Then, when we have added enough air to the milk and it is the desired volume, we can focus solely on heating it to the desired temperature.
THE RIGHT TEMPERATURE
The ideal temperature for milk, when combined with coffee, is a subject of some contention between many coffee shops and their customers. Milk begins to irreversibly degrade in flavour and texture above 68°C (154°F). This is because the heat alters and denatures the proteins, creating new flavours, though not always good ones. The smell of cooked milk reminds me of eggs at best, and baby sick at worst.
A very hot cappuccino will lack the texture, flavour and sweetness of a drink made with milk that has only been heated to 60°C (140°F). It is impossible to produce good microfoam when the milk has been heated to boiling point. Unfortunately this is the nature of milk – we can either have a very hot or a very delicious drink. This is not to say that all drinks should be served lukewarm, instead that they should be enjoyed as soon as they are made.
WHOLE MILK OR SKIMMED?
It is the protein in the milk that supports the bubbles, so milk will foam well regardless of whether it is skimmed or whole. However, the fat content does play a role: it adds a wonderful texture to the drink, but also changes the way flavour is released. A cappuccino made with skimmed milk has an immediate, intense coffee flavour which does not linger. If the cappuccino is made with whole milk, the flavours will be less intense but will last longer. I always recommend using whole milk, but I also prefer relatively small milk drinks. I think a small, rich cappuccino is a delight.
STEAMING MILK METHOD
This technique is suitable for traditional steam wands. If your machine has a range of attachments or automatic frothing functions, follow the manufacturer’s instructions.
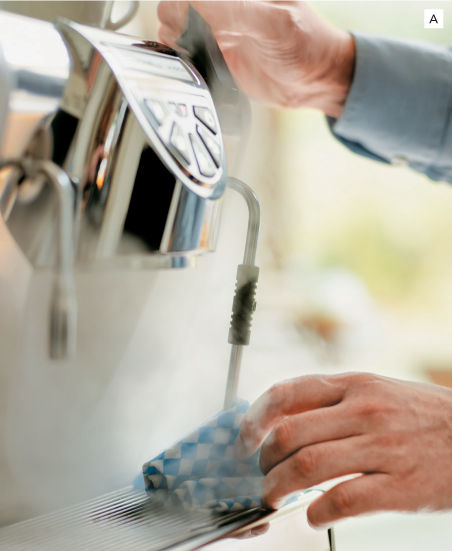
1 Start by pointing the steam wand over the drip tray or into a cloth and briefly opening the valve. This will get rid of any condensation inside the wand. This is known as purging. A
2 Pour cold fresh milk into a clean stainless-steel steaming pitcher. It should not be more than sixty per cent full. 3 Dip the steam wand into the milk so just the tip is submerged. 4 Open the valve to full flow and gently lower the pitcher until the wand is almost out of the milk. Listen carefully: you want to hear the slurping sound of the steam wand start to whip air into the milk. As the milk expands, lower the pitcher a little more to bring it back to the surface if you wish to add more air. 5 When you have your desired amount of foam, which should ideally happen before the milk feels warm to the touch, then submerge the steam tip again to start heating the foam – you want it to be just under the surface. Position it slightly to one side and you will see the milk start to spin and churn. The process should now be relatively quiet. 6 To test whether the milk is warm enough, place your free hand on the bottom of the jug. Continue to heat the milk until the jug becomes uncomfortable to touch. At this point the milk will be about 55°C (131°F). Remove your hand from the bottom of the jug and continue to steam for three to five seconds, depending on how hot you like your milk. B
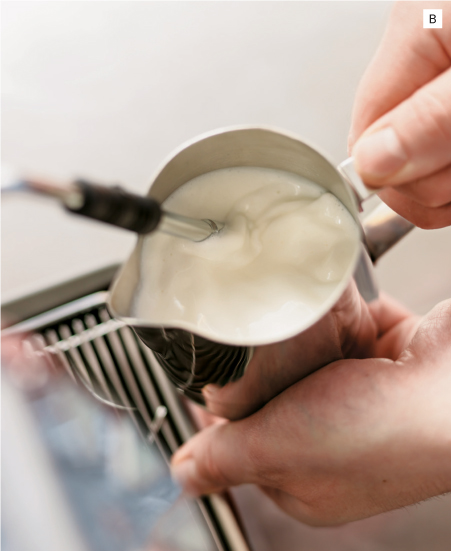
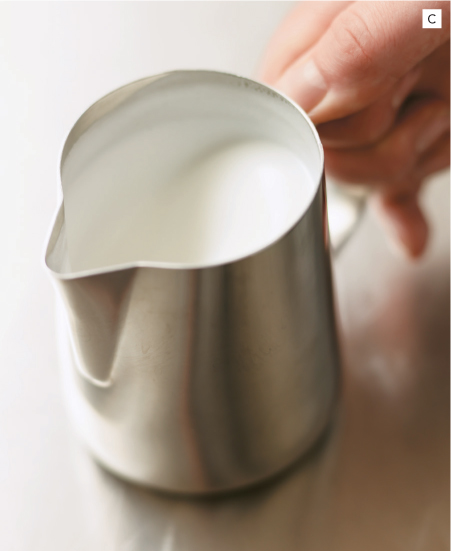
7 Close the steam valve fully and put the milk pitcher down. Wipe the steam wand with a clean, damp cloth and purge the wand into the cloth to remove any leftover milk from inside the wand. 8 Don’t worry if your foam contains a few large, ugly bubbles. If you let it sit for a few seconds, the milk will drain off the surface of the larger bubbles, making them very brittle. A couple of gentle taps of the steaming pitcher on the counter will usually pop them. 9 If you want to pour a combination of milk and foam into your drink, which I strongly recommend, you must make sure that they are fully combined. After the tapping, swirl the milk and foam together, much like you might swirl wine in a glass before smelling it. You can be quite aggressive, as you want to make sure that the liquid milk is fully combined with the wonderful microfoam. Swirl until the milk foam has a glossy finish, then pour it into your drink. C
ESPRESSO EQUIPMENT
There are espresso machines to suit almost any budget, from cheap units with which you can make a start, to smarter machines that can cost as much as a small car. All of them are designed to do the same thing: heat water, then push it forwards at high pressure.
The more money you pay, the more the machines improve in build quality, control and consistency. Most of this consistency concerns how the machine heats water, and how it creates water pressure, and different types of espresso machine achieve this in different ways.
THERMOBLOCK MACHINES
The cheapest domestic espresso machines use this technology to produce espresso. There is a single unit inside the machine with an element to heat the water. Most of these machines have two settings: one to heat the water up to a suitable temperature for brewing coffee, and the other to boil water to generate steam. This means that the machine can only perform one function at a time, and I would recommend brewing coffee first, and then heating up the machine to steam milk.
Broadly speaking, thermoblock machines do not produce a very consistent water temperature, and the lack of ability to perform both brewing and steaming at once limits how many drinks the machine can practically make, which can be frustrating for the user. However, when paired with a good grinder, they can certainly produce good espresso.
Thermoblock machines usually use a vibration pump to generate pressure. These have two disadvantages: they are quite noisy, and they are rarely accurately set. The desired pressure for espresso is around nine bars (130psi). These pumps are usually set much higher and manufacturers will often proudly boast that their machine can produce fifteen bars (220psi) of pressure, as if more is somehow better.
The machines have an overpressure valve that opens above nine bars (130psi) to alleviate the excess pressure. These valves are not usually very well calibrated, and may need adjustment over time. However, I do not recommend opening up your machine as you will probably invalidate your warranty.
Thermoblock machines are undoubtedly the most popular and widespread of espresso machines, but many people who enjoy making espresso soon begin to feel constrained and start to think about an upgrade.
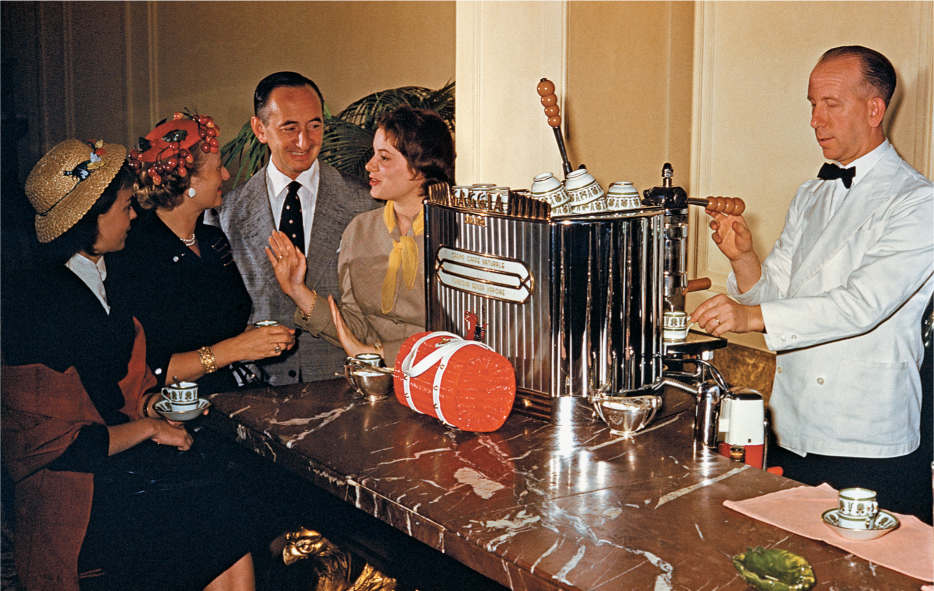 Customers in Rome in the 1950s are served their espresso by a smartly dressed barista. Though a gleaming machine is a delight to look at, it is more important to have an excellent coffee grinder.
HEAT-EXCHANGE MACHINES
Although it is still common in commercial espresso machines, this technology is available in home machines too. The machine still has a single element, but it heats a small boiler of water to around 120°C (248°F). This generates plenty of steam, which is always available for foaming milk. However, the water in this boiler is too hot to brew coffee, so the machine pumps fresh cold water through what is called a heat exchange. This is usually some sort of tube that passes through the steam boiler. While the coffee-brewing water is kept separate from the boiler water, heat from the boiler is quickly passed to the brewing water to bring it up to the desired temperature.
These kinds of machines are often referred to as ‘prosumer’, as they straddle the divide between consumer prices and professional performance. The disadvantage of heat-exchange machines, certainly domestic ones, is that changes in the boiler temperature will affect the temperature of the brew water. If you want more steam, you have to increase the boiler temperature, which will also increase the brew temperature. If you want to noticeably reduce the brew temperature, your steaming performance may suffer.
Many of these machines use mechanical thermostats to control the boiler temperature and these can result in some variation. Better machines have more reliable control over the steam boiler temperature.
Heat exchange machines can be fitted with either a vibration pump (see above) or a rotary pump. Rotary pumps are used on commercial equipment and are quieter and easier to adjust, but there is not a lot of difference in performance between the different types of pump if they are set to the same pressure.
DUAL-BOILER MACHINES
The idea here is to separate the coffee brew water entirely from the water used to generate steam, and as the name suggests the machine does this by having one boiler and element for the brewing water, and then a separate small steam boiler that heats its water up to a higher temperature for producing steam and boiling water for tea or americanos, for example.
The temperature in the coffee boiler is usually very finely tuned with digital controls, allowing easy adjustments of temperature and greater levels of stability. These machines can undeniably produce coffee as good as any commercial machine, but they often come with price tags to match.
ESPRESSO GRINDERS
A grinder suitable for use with an espresso machine will need to do two key things: it must be able to grind the coffee finely enough to make good espresso, and it must be easily adjustable to make very small changes in the grind size.
More expensive grinders tend to have better control over the grind setting, and a more powerful motor inside, which will be quieter. At the top end are the burr grinders with cutting discs inside, which produce fewer very tiny pieces of coffee that can add bitterness to the cup.
Many people who are passionate about espresso end up with a small, basic commercial grinder, rather than a top-end domestic model. However, there are good domestic machines out there. Ideally, try to find a grinder described as ‘grind to order’, which means that it does not have a chamber to store large quantities of ground coffee, but is instead designed to dispense the grounds straight into the basket in the brew handle.
A WORD OF ADVICE
A great espresso machine can be a beautiful object, a satisfying tool and a technical marvel but it will be a waste of money if you are pairing it with anything but an excellent coffee grinder.
I would always recommend upgrading your coffee grinder first, rather than your espresso machine. A good grinder and a thermoblock machine will make better coffee than a cheap grinder and a top-of-theline dual-boiler espresso machine. Spending money on a grinder gives a greater return on investment when it comes to how good your coffee will taste at home.
ESPRESSO-BASED DRINKS
Whether they are long, short, milky or dark, there is a wide variety of coffee drinks that start with an espresso as their base.
ESPRESSO

There are many definitions for what makes an espresso an espresso, some extremely precise and some more general. I would define an espresso as a small, strong drink made using finely ground coffee under high water pressure. I would also add that an espresso should have crema. More precisely, I would say the ratio of the weight of ground coffee to the weight of the finished beverage is about 1:2. I would rather have an open definition and treat espresso as a broad church, than be overly prescriptive about what is right and wrong.
RISTRETTO

This translates from the Italian as ‘restricted’ and the idea is to produce an even smaller and stronger cup of coffee than an espresso. This is done by using less brewing water for the same amount of ground coffee. The grind of the coffee should be finer so the brew time remains long enough to extract all the desirable aromatics from the coffee.
LUNGO

The lungo, or ‘long’ coffee, was until recently considered deeply unfashionable in the speciality coffee world. It was usually brewed using an espresso machine but with two or three times the amount of water to the same weight of coffee to make a much longer drink. The resulting cup was much weaker and, while a longer-lasting experience for the consumer, it was considered inferior due to the lack of body and mouthfeel. In fairness, most coffee brewed this way is terrible, and tastes very bitter and ashy.
However, recently there has been a movement within the speciality coffee industry to brew lighter roasted coffees this way, resulting in a complex and balanced brew that I think can be delicious. If ever you are struggling to balance the acidity in an espresso blend, try making it into a longer drink by adding more water to the same amount of coffee. The grind will need to be made a little coarser to allow a faster flow and prevent overextraction.
MACCHIATO

This drink takes its name from the idea of ‘marking’ or ‘staining’ an espresso with some milk foam. In Italy it is not unusual to see a busy barista line up several cups of espresso on the bar for the customers. If one of the customers likes just a drop of milk in their drink, it is important to add a small dollop of milk foam as well to mark which cup it is. If you pour just a little milk into a freshly made espresso it will disappear under the crema, and you won’t be able to spot it.
In the last decade or so, many quality-focused coffee shops have done something quite different with the drink. They have turned a macchiato into an espresso topped up with foamed milk. This is often done at the request of the customer, who wants a longer, weaker and sweeter drink. Sometimes, however, it is done because the barista likes to show off and pour latte art in very small cups.
To further confuse matters, Starbucks have a drink called a Caramel Macchiato. This is an entirely different drink, much closer to a caffe latte that has been ‘marked’ or ‘stained’ by caramel syrup. This has created some customer confusion, especially in North America, so it is now common to see coffee shops refer to what they offer as a ‘traditional macchiato’.
CAPPUCCINO
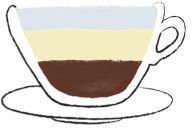
There remain a great many myths around the cappuccino. One to get out of the way quickly is that the name has nothing to do with the hoods of monks’ robes, nor the bald spot on their heads. The original name for the drink was a kapuziner, and it was a Viennese drink in the 19th century. It was a small brewed coffee mixed with milk or cream until it attained the same shade of brown as the Capuchin monks’ robes. Essentially the name implies the strength of the drink.
Another recent myth surrounding the cappuccino is the rule of thirds. The rule of thirds is passed around to this day, and describes a traditional cappuccino as being one-third espresso, one-third milk and one-third foam. I was taught this very early on in my coffee career but this recipe has no root in tradition. I have read quite a few books about coffee and the first reference to the cappuccino rule of thirds I can find was written in the 1950s. It describes cappuccino as ‘an espresso mixed with equal amounts of milk and foam.’ This sentence appears almost verbatim a number of times in the book. The phrase is a little ambiguous as it could be saying that only the milk and foam are in equal quantities, or that all three ingredients are. So instead of the recipe being 1:1:1, the author could easily have meant it was 1:2:2. The 150–175ml cappuccino made with a single shot of espresso in the ratio of 1:2:2 does have a long tradition, and is still widely served in much of Italy and the parts of Europe that haven’t yet succumbed to more generous portions of coffee as fast-food retail. This drink is also, when well made, absolutely delicious.
I think a great cappuccino is the pinnacle of milk-based espresso drinks. A rich layer of dense, creamy foam combined with sweet, warming milk and the flavours of a well-brewed espresso are an absolute delight. The closer to lukewarm you can enjoy a cappuccino, the sweeter it will be, and I confess that the best ones I’ve drunk disappear in a few greedy mouthfuls – impossible if the drink is too warm.
ONE CAPPUCCINO A DAY
There is a tradition in Italy of having just one cappuccino in the morning, then drinking only espresso for the rest of the day. I believe this is a fascinating example of culture reflecting diet. Like most southern Europeans, many Italians are lactose intolerant. However, a lactose-intolerant person can consume a small amount of milk without a problem, hence the daily cappuccino. A second or third cappuccino, however, even a small Italian one, could result in some gastric distress, so Italian culture prevents the excessive consumption of milk by making it a small cultural taboo to keep drinking cappuccino throughout the day.
CAFFE LATTE
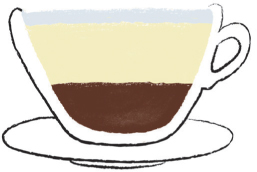
This drink did not originate in Italy. When espresso first spread around the world, it was a bitter, intense and extraordinary coffee experience for most. For some people, the bitterness was a problem so they added hot milk to make the drink sweeter and less bitter. The caffe latte was created to satisfy the customers who wanted the coffee experience with less intensity.
Typically there is more liquid milk in a caffe latte than a cappuccino, making the coffee flavour less intense. It is also traditional to have less foam in the milk.
I am always careful to describe the drink as a caffe latte, rather than just a latte, because many people travel to Italy and if they order a latte there, they will suffer the humiliation of simply receiving a glass of milk.
FLAT WHITE
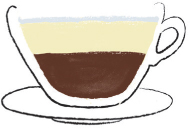
Different coffee cultures around the world have contributed different drinks, and while the argument continues over whether the flat white was invented in Australia or New Zealand, it is undeniably from Australasia and has been spread by those who have travelled to Europe and North America to open businesses there. In the UK, the name first became synonymous with the offerings of quality-focused cafés, to the point that it was adopted by the major chains and put on their menus. The drink probably had lowlier origins, however. By the 1990s it was common, almost everywhere outside Italy, for a cappuccino to come with an enormous head of dry, meringue-like foam. Sometimes this would rise up from the top of the cup like a mountain, carefully dusted with chocolate powder. Many consumers were frustrated to be sold a cup of coffee that seemed to be mostly air and began to ask for a flat, white coffee. No foam, just coffee and milk. These became sufficiently part of the culture there that when people started focusing on quality more and more, and on better milk texture and latte art, the flat white was remade as something delicious.
The best description I can offer is that a flat white is like a small, strong latte. It should have a strong coffee flavour, and is usually made with a double ristretto or a double espresso, topped up with hot milk to make a 150–175ml drink. The milk has a little foam added to it, but not very much. This makes it relatively easy to pour intricate patterns, known as latte art, into the drink.
AMERICANO

The story goes that the American soldiers stationed in Italy after World War II found the espresso too strong. They often asked for their espresso to be served with some hot water, or diluted down to the point that it resembled the coffee they were used to at home. This style of drink picked up the name ‘caffe americano’.
Although it resembles a cup of filter coffee, I think the americano is somewhat inferior. However, it remains popular with café owners because it allows them to serve filter coffee-strength brews without having to buy additional equipment.
My recommendations for making an americano are simple. Pour some fresh, clean hot water into a cup, then brew a double espresso on top. If your espresso machine has a steam boiler, it should be able to deliver the hot water, although if you have not taken water from the machine for a while it may taste unpleasant. Some people claim that you should never add very hot water to an espresso, and always brew the espresso on top of the hot water. I don’t think it makes a great deal of difference, I just find the resulting coffee is cleaner and looks better.
The one disadvantage of diluting espresso is that you increase the perceived bitterness slightly. For that reason, as soon as you finish brewing the americano, I would recommend scooping the crema off the top of the drink and discarding it. Crema is delightful to look at, but there are many tiny pieces of ground coffee trapped in the foam so the crema contributes additional bitterness to the drink. Removing the crema before stirring and drinking definitely improves the flavour of an americano. (I would also recommend tasting an espresso after you remove the crema – the difference in flavour is dramatic. While I actually prefer the taste of an espresso without crema, I don’t want the extra work and am happy enough to enjoy it as it is. With an americano, however, I really do think the extra work is worthwhile.)
CORTADO
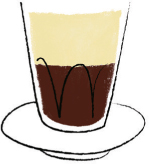
This is one of the few coffee-based drinks that does not have Italian origins. In fact, it comes from Spain, most likely Madrid, where it is commonly served. Traditionally the Spanish brew their espresso slightly longer, often a little weaker than the Italians. To make a cortado, about 30ml of espresso is combined with an equal quantity of steamed milk. This is traditionally served in a glass. The drink seems to have spread and has been reinterpreted in a few different ways, but this is the basic idea behind it.

 A promotional poster for Perles des Indes, established in 1905 by René Honoré. The largest French importer of coffee, the company roasted more than 2,000kg (4,400lb) of beans daily.